Have you ever wanted to bring a quirky, original character from your imagination to your physical desk? Welcome to the delightful world of Nano Banana AI 3D figurines, where artificial intelligence meets hands-on making. This guide will walk you through the entire process of creating your own tiny, banana-inspired character, from the first spark of an idea to holding a painted miniature in your hand. Using Google’s Gemini for ideation and creative assistance, and free tools like Blender for 3D modeling, you’ll learn a complete, beginner-friendly workflow. You’ll discover that making your own nano banana ai 3d figurines is an accessible, fun, and incredibly rewarding project.
How to Make Nano Banana AI 3D Figurines with Gemini
Planning Summary: This guide provides a complete, step-by-step workflow for creating a 3D-printable banana-themed character. We’ll leverage Gemini for AI-assisted brainstorming and problem-solving, then move into practical 3D modeling in Blender, covering essential concepts for successful printing. The process culminates in slicing, printing, and finishing your unique ai banana figurine.
(Featured Snippet Answer)
To make Nano Banana AI 3D figurines, follow these steps: 1) Use Gemini to generate concepts and prompts for your banana character. 2) Model the figurine in Blender, focusing on simple, printable shapes. 3) Prepare the 3D model by checking geometry and exporting as an STL. 4) Slice the model using software like Cura with appropriate settings for small figurines. 5) 3D print and post-process your creation with sanding and painting.
What is Nano Banana AI?
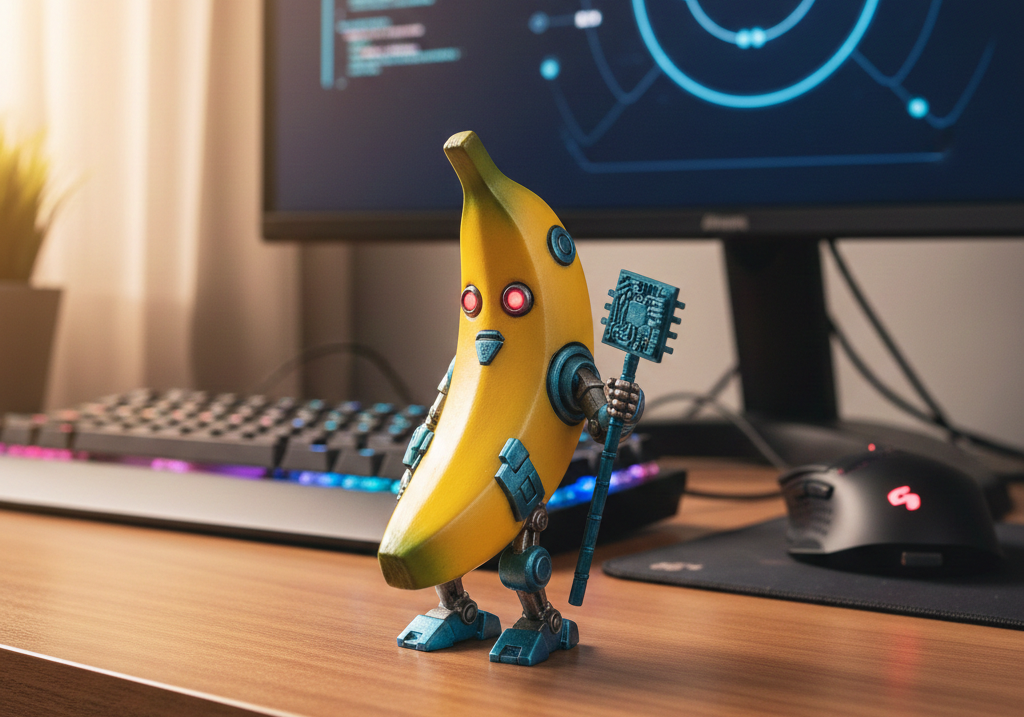
Before we dive into the “how,” let’s clarify the “what.” A Nano Banana AI character is a small, often cute or stylized, figurine with a banana as its core theme. Think of it as a mascot—a banana given personality through eyes, limbs, expressions, and accessories. The “Nano” signifies its small, collectible scale, perfect for a 3D-printed miniature. The “AI” component comes from using tools like Gemini to supercharge the creative process. You’re not asking AI to do everything; you’re partnering with it to brainstorm concepts, solve design challenges, and generate descriptive prompts that fuel your own modeling work.
This fusion of AI-assisted ideation and traditional digital craftsmanship makes creating nano banana ai 3d figurines gemini a uniquely modern and accessible creative outlet. to know more about it visit here.
Tools and Materials You’ll Need
Don’t worry—you don’t need a professional studio. Here’s what you’ll use, focusing on free and accessible options.
Software:
- Gemini: Your AI brainstorming partner. We’ll use it for text-based ideation, prompt creation, and procedural guidance. (Note: We assume text-based interaction; if image generation features are available, they can be a bonus for reference images).
- 3D Modeling Software: Blender is our top recommendation. It’s incredibly powerful and completely free. Alternatives include Tinkercad (easier, browser-based) or Fusion 360 (free for hobbyists).
- Slicer Software: This translates your 3D model into printer instructions. Ultimaker Cura and PrusaSlicer are excellent, free choices.
Hardware (Optional for Printing):
- 3D Printer: An FDM (Filament) printer using PLA plastic is most common for beginners. Resin printers (SLA/MSLA) offer higher detail but require more safety precautions.
- Basic Tools: Flush cutters for support removal, fine-grit sandpaper (400-800 grit), tweezers.
- Finishing Supplies (Optional): Primer spray (filler primer works great), acrylic paints, small brushes, and a clear varnish sealant.
Files: You’ll create and export your model as an STL or OBJ file, the universal formats for 3D printing.
Your Workflow Overview: From Idea to Object
Here’s the high-level map of our journey:
- Concept & Reference: Use Gemini to define your character’s style, pose, and feel.
- 3D Modeling: Build your character in Blender, starting with simple shapes and adding details.
- Print Preparation: Check and fix your model, then export it.
- Slicing: Configure print settings like layer height and supports for your specific printer.
- Printing & Finishing: Run the print, clean up the model, and bring it to life with paint.
Step-by-Step Guide to Making Nano Banana AI 3D Figurines
Step 1: Concept & Reference Gathering with Gemini
This is where the magic starts. Instead of staring at a blank screen, we’ll use Gemini as a creative co-pilot. The goal is to generate a clear, descriptive brief for your ai banana.
How to Prompt Effectively: Be specific about scale, style, and printability. For example, to generate core concepts, you could use this exact prompt:
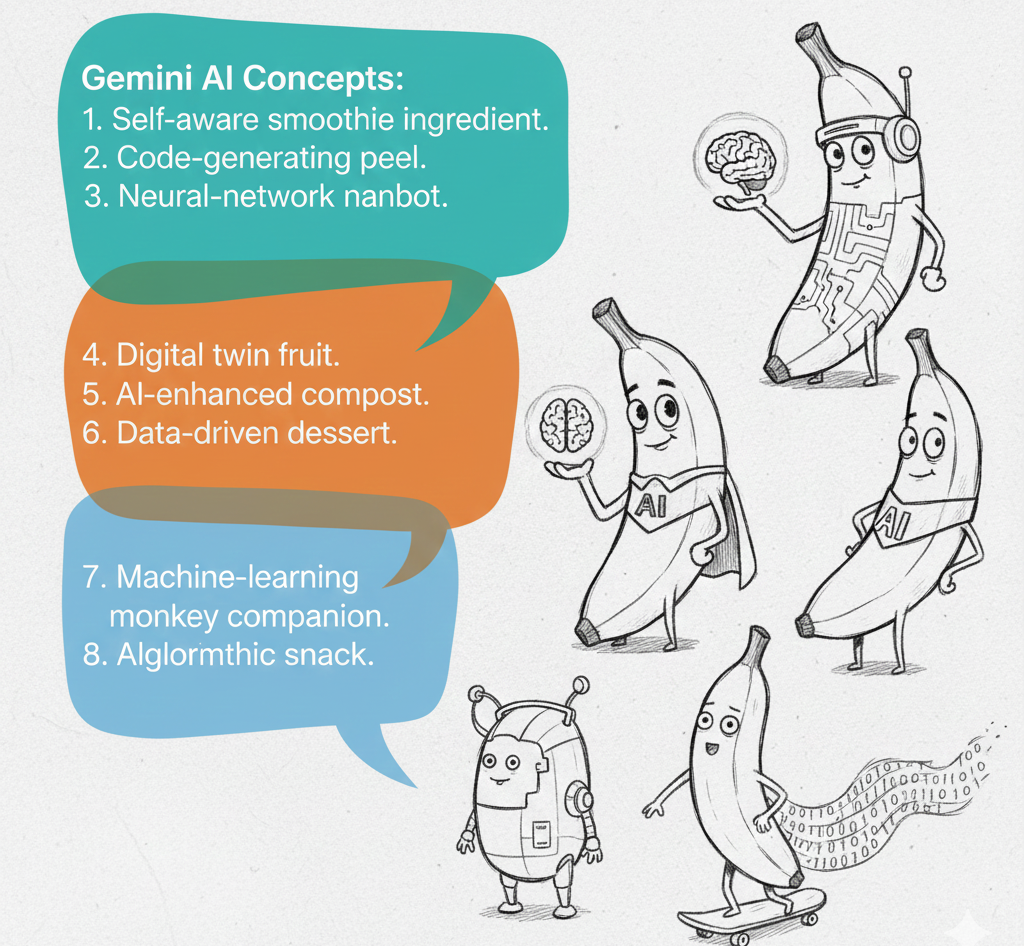
“Create 5 concept directions for a playful ai banana character designed as a small 3D-printable figurine. Include style notes (cute vs. heroic), pose ideas, and accessory variations. Focus on clean shapes that print well at nano scale.”
Gemini might suggest a “Chibi Banana Bot” with stubby limbs and a tiny wrench, or a “Banana Knight” with a peel-shaped shield. Ask follow-up questions: “For the ‘Sleepy Banana’ concept, what would a simple, printable sleeping pose look like?”
Once you have a direction, ask for style specifics. Use a prompt like:
“Suggest stylization options for nano banana ai 3d figurines gemini, emphasizing strong silhouette, minimal overhangs, and printable details like eyes, peel ridges, and simple limbs.”
This will give you practical advice on making your design printer-friendly from the start. Save the text outputs and any generated images as your mood board.
Step 2: Blocking Out the Model in Blender
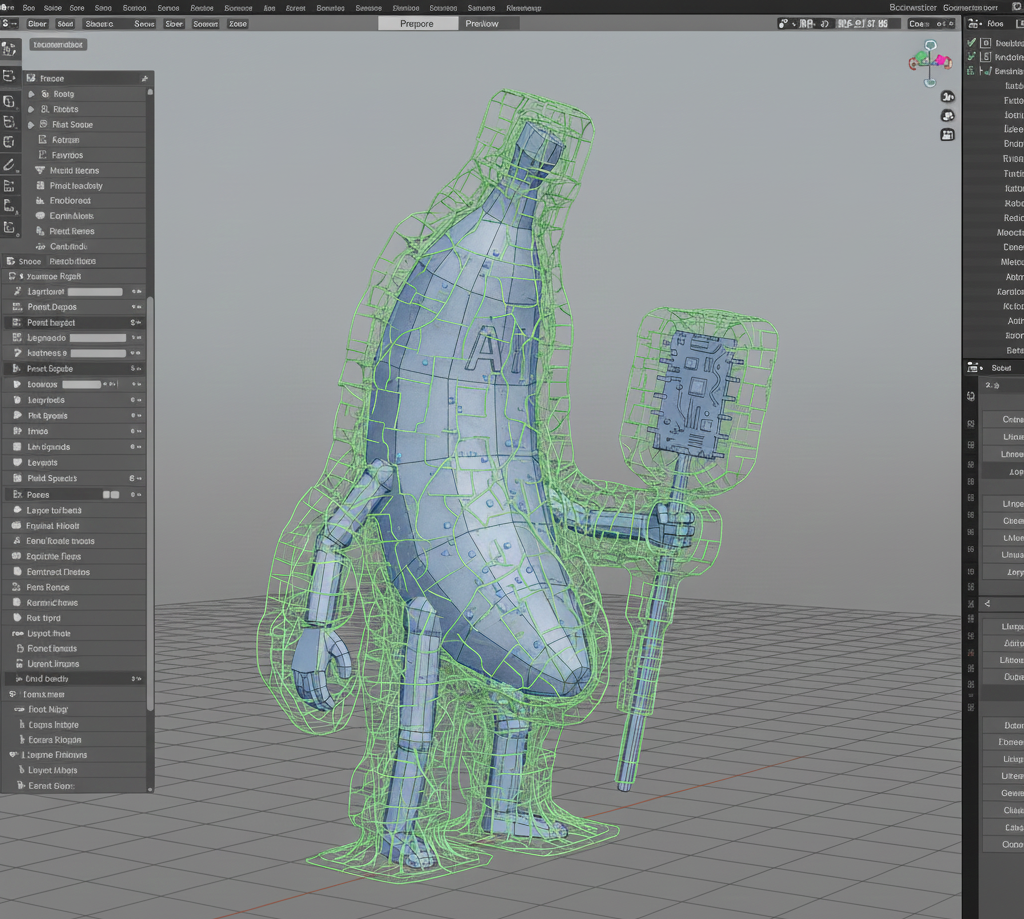
Open Blender and start a new project. We begin with “blocking out”—using basic 3D shapes (primitives) to define the character’s proportions and pose.
- The Body: Add a cylinder and scale it into a banana shape. Think of this as your armature.
- Limbs & Head: Add spheres for the head and simple cylinders or cones for arms and legs. In Blender, you can edit these shapes in Edit Mode (
Tabkey). - Scale Considerations: Remember, this is a “nano” figurine. A good starting size is 3-5cm tall. Keep limbs relatively thick (at least 2-3mm) for strength.
- Topology & Manifold Geometry: This is crucial for printing. Your model must be a “watertight” mesh with no holes or internal faces. Use Blender’s Solidify modifier to give thin shapes wall thickness. Always apply the modifier once set.
Step 3: Detailing & Stylization
Now, inject personality! This is where your nano banana ai prompt ideas come to life.
- Peel Details: Use the Loop Cut tool (
Ctrl+R) to add horizontal rings to the banana body, then slightly scale every other ring inward to suggest peel ridges. - Face: For eyes and a mouth, you can use the Inset Face tool on the front of the “head” sphere. Keep these details raised (embossed) rather than deeply cut (engraved) for easier printing.
- Accessories: Add simple shapes for glasses, a hat, or a backpack. Ensure they are properly connected (boolean union or manually merged) to the main body to avoid separate, tiny parts.
Pro Tip: Regularly check your model from all angles. Avoid extreme overhangs (parts that stick out sideways without support underneath). A 45-degree rule is a good guideline.
Step 4: Preparing for Print
Your model looks great, but is it ready for the printer?
- Final Checks: Select all parts and join them into one mesh (
Ctrl+J). Run Blender’s 3D Print Toolbox add-on (enable it in Preferences) to check for “Non-Manifold” edges and “Intersecting” faces. Fix any issues it finds. - Solidify Everything: Ensure every surface has thickness. If you used planes for details, give them volume with the Solidify modifier.
- Export: Go to
File > Export > STL (.stl). Choose a clear name likeNanoBanana_Hero_V1.stl.
Step 5: Slicing Settings (FDM Example)
Open your slicer (e.g., Cura) and import the STL.
- Layer Height: 0.1mm for high detail, 0.2mm for faster prints.
- Infill: 15-20% is plenty for a small figurine.
- Supports: Enable “Generate Supports” (Touching Buildplate only). For these nano banana ai 3d figurines, tree supports are often very effective and easier to remove.
- Adhesion: A “Brim” (5-8mm) helps prevent warping and keeps the small footprint stuck to the bed.
- Material: PLA at 200-210°C, bed at 60°C.
Always use the “Preview” mode to examine the toolpath and ensure supports are placed correctly under overhangs like arms or a protruding chin.
Step 6: Printing & Post-Processing
- Printing: Ensure your bed is level. Start the print and monitor the first few layers.
- Support Removal: Once cooled, carefully peel or snip away the support material. Use tweezers for tiny spots.
- Sanding: Lightly sand any rough spots or support scars with fine-grit sandpaper.
- Priming & Painting: Spray with a light coat of primer. This reveals any flaws and creates a surface for acrylic paint to stick to. Paint with thin layers, add details, and seal with a matte or gloss varnish.
Resin Printing Note: If using a resin printer, follow all safety protocols (gloves, mask, ventilation). Wash and cure the print according to your resin’s instructions. Supports are essential and must be carefully cut away.
Gemini-Assisted Prompting: Your Creative Toolkit
Beyond the initial concept, Gemini can assist throughout your journey. Here are reusable prompt templates. Remember, you can find a nano banana ai free approach by using these prompts with free software like Blender and Cura.
- For Pose Exploration: “Generate 10 dynamic but printable pose ideas for a bipedal banana character with short limbs, considering balance and support needs for FDM 3D printing.”
- For Modeling Guidance: Ask Gemini to “outline step-by-step modeling instructions in Blender to 3d model nano banana ai 3d figurines suitable for FDM printing: primitives to start, modifiers, thickness, manifold checks, and export settings (STL).”
- For Troubleshooting Help: If you encounter printing issues, use a prompt like: “Given stringing on thin limb parts of a nano banana ai 3d figurines model, recommend slicer tweaks (temperature, retraction, travel), orientation adjustments, and support strategies.”
- For Detailing Ideas: “List 20 small, printable accessory ideas (e.g., bow tie, single eyeglass, tiny sword, watch) that could fit a 4cm tall banana character.”
- For Free Resources: “List nano banana ai free learning resources and printable checklists for beginners creating small character figurines, with safe, beginner-friendly settings.”
Troubleshooting & Tips
- Model Holes/Non-Manifold Geometry: Use Blender’s “Merge by Distance” and “Fill” tools in Edit Mode. The 3D Print Toolbox is your best friend here.
- Print Not Sticking: Re-level bed, clean bed with isopropyl alcohol, increase bed temperature or brim width.
- Stringing/Hairy Prints: Increase retraction distance/speed in your slicer, lower printing temperature by 5-10°C.
- Figurine is Too Fragile: Redesign with thicker limbs (minimum 2.5mm), orient the model so layer lines don’t stress thin areas, or increase wall count/perimeters in the slicer.
- Poor Detail: Reduce layer height (e.g., to 0.08mm), check nozzle for clogs, and ensure printing speed isn’t too high for small features.
Cost, Time, and Skill Estimates
- Cost: $0 for software. ~$20-$30 for a roll of PLA filament (enough for dozens of figurines). A beginner FDM printer starts around $200. Painting supplies: ~$30 for basics.
- Time: Concept: 30 mins. Modeling (first time): 3-6 hours. Slicing & Printing: 1-4 hours (print time). Post-processing: 1-2 hours.
- Skill: Absolute beginners can follow this guide. Patience and willingness to learn are the key skills. Check out our Blender Basics tutorial to build foundational knowledge.
Ethics, Safety, and IP Notes
- Intellectual Property: Use AI-generated concepts as inspiration, but put your own creative spin on the final model. Aim to create original designs.
- Safety: When 3D printing, ensure good ventilation. Handle isopropyl alcohol (for resin) and spray primers/paints in well-ventilated areas, away from sparks or flames. Wear appropriate gloves and masks as needed. Always consult your printer’s manual and material safety data sheets (MSDS).
Conclusion & Your Next Steps
Congratulations! You’ve now learned the complete process for how to make nano banana ai 3d figurines. You’ve seen how Gemini can act as a powerful ideation engine, providing the nano banana AI prompt inspiration and technical guidance to fuel your project. You’ve walked through the fundamentals of creating a printable 3d model, nano banana ai 3d figurines in Blender, and preparing it for the real world.
The journey from a whimsical idea to a tangible object is incredibly satisfying. Start simple, embrace the learning curve, and don’t be afraid to iterate. Your first banana might be a bit lumpy, and that’s part of the charm.
FAQ Section
Q1: What exactly are Nano Banana AI 3D figurines?
A1: They are small, 3D-printable character figurines with a banana theme, designed with the help of AI tools like Gemini for brainstorming and problem-solving. They blend whimsical character design with practical digital fabrication.
Q2: Do I need a 3D printer to make these?
A2: No, you don’t! You can follow the guide to design your figurine using Gemini and Blender for the pure joy of creation. You can then share the digital file or use an online 3D printing service to have it printed for you.
Q3: Is this project suitable for complete beginners?
A3: Absolutely. This guide is written with beginners in mind. While 3D modeling has a learning curve, starting with a simple character like a banana is a perfect way to learn the essential tools and concepts in a fun, project-based way.
Q4: What is the most challenging part of making these figurines?
A4: For most beginners, the transition from concept to a clean, printable 3D model is the biggest step. Ensuring your model is “manifold” (watertight) and has appropriate wall thickness requires careful attention. Using Gemini for modeling guidance and Blender’s analysis tools makes this much easier.
Q5: Can I sell the Nano Banana AI figurines I create using this method?
A5: You can sell physical prints of your own original designs. However, it’s important to ensure your final model is a unique creation you’ve built yourself, significantly different from any direct AI-generated outputs or copyrighted characters you used for inspiration. Always respect intellectual property.